Autumn is the time of the year for capturing great color in your landscape panoramas but you also need to be thinking about composition and consistency in your stitched images when processing your pano. So we start with a great video on panorama composition and an even better, two-part video in our Pinnacle video education library that will improve your processing consistency. And, there are a lot more information treats that follow. Let’s get going!
Panorama Landscapes – Lead Your Viewer’s Eye Through The Image
 When you get right down to it great landscapes rely on two elements, special light and thoughtful composition. You really can’t have one without the other though many photographers have tried relying on interesting light alone to grab the viewer. But, if you want to keep a viewer’s eye on your photograph you need to reveal different elements to them as their eyes move around the frame. This can be especially difficult when creating panoramas. This video and article will get you thinking about good composition that keeps your viewer engaged.
See the panorama composition video HERE
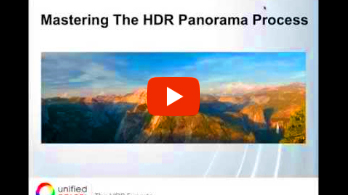
Mastering the HDR Panorama Process
 This is a great two-part panorama instruction series with commercial panorama shooter Richard Sisk and our own VP of Marketing and accomplished photographer John Omvik. These two videos will take you through the HDR Expose panorama batch process to achieve consistent panels that will stitch beautifully for a compelling final image. Click on the HERE button that follows and you’ll be taken to the Pinnacle Video Tutorial page. Scroll down to the fourth row of videos where you’ll find “Mastering The HDR Panorama Process Parts 1 & 2”.
Watch the pano processing videos HERE
Check out Richard Sisk’s website HERE
You’re Going To Do It Eventually – Manual Exposure!
 You shoot in A, S or P mode. It’s not a bad thing. In fact, in fast moving situations like navigating the changing light at a wedding or sporting event those automatic settings can save your entire shoot. But those same job-saving settings can backfire on you when you’re in backlit situations, high contrast situations, situations where you need max depth of field and a whole sack of others. Before too long you’ll reach a point where you crave maximum control of your photo outcome. You won’t want to hope your image was well exposed, you’ll know it.
Many say Manual Exposure is too difficult to master yet alone understand. Well, it’s not. And, if you start using it on a
regular basis you won’t believe how fast it becomes second nature and how your photo consistency improves.
We’ve tracked down a great video that breaks down why and how to use manual exposure. It’s created by photographer Sean Tucker and he’s got a gift for teaching. We’re sure you’ll take the next step toward going manual by watching the video.
Watch the video and go manual HERE
Color and Luminance Range Masking in Adobe Camera Raw
 Many of the pro photograhers we work with, they do their first edits in HDR Expose to get a great master file. Then,
they make additional tweaks in other apps in order to use some tools they’ve become rely on. If you shoot RAW and you use Adobe Camera Raw after you may be puzzled about a tool that’s been added. It’s called Color and Luminance Range Masking tool. That’s a mouthful to say but it’s easy to use once you know how and it can give you graduated luminance and color results you once had to accomplish using multiple tools. Here’s a YouTube video by veteran Adobe Evangelist Julianne Kost that will take you through using the tool.
See the video HERE
Just how do you pronounce Bokeh Anyway?
 Have you been in a camera store and start talking with the salesperson about a new lens’ product characteristics? If so, the Japanese word “bokeh” most likely came up and neither you nor the sales person was really sure how to pronounce it. Now, you’ll have one up on the sales rep the next time that happens.
It’s pronounced correctly HERE
Bad HDR
 It’s been a long, long time since we visited one of our guilty pleasure websites which is one of the most amusing sites on the web for HDR photographers. It’s actually called S$#%%y HDR and it does not disappoint. Indeed, you can find some of the absolute worst implementations of HDR processing available anywhere on its pages. The creators of these maserpieces have no hesitation to push the processing bar far to the right when it comes to garish color, horendous halos, ultra-patterned clouds and bad composition. A visit to this site will straighten you right out if you’re an HDR abuser.
Walk on the bad side HERE
Julianne Kost’s Blog
 There are some luminaries in the photography world who you want to hear speak time and time again. One of those greats is Julianne Kost. Kost is Adobe’s Principle Evangelist who has been named one of Fast Company’s 100 Most Creative People In Business. She contantly and tirelessly makes the rounds of photography shows, software conventions and club meetings demonstrating the processes, tips, and tricks of image processing. When you hear her present you learn and; you learn really useful stuff that sticks in your brain. She’s also a great photograher. If you’ve never had the pleasure to attend one of her presentations you should at least visit her blog.
Visit Julianne’s blog HERE